Search This Blog

Monday, April 17, 2017

Notification clean up

Cleaning up the notifications
Alerts in Event inbox can build up overtime and should be cleaned up periodically as part of your general maintenance tasks. How often? It depends on your organization's usage of alerts and how long your organization requires the alerts that are saved.
Getting ready
This is an administrator's task, so you will need to log in to AX as the system administrator. 

How to do it... 
To clean up alert notifications, follow these steps

1.      Navigate to System administration | Periodic | Notification clean up.
2.     


Note : Do not click on OK to the defaults, as this will delete all the notifications!

3.      Click on Select.
4.      Configure the query to delete notifications based on your organizations policy


Friday, October 28, 2016

Use AX Form As lookup in Dynamics Ax 2012

AX-2012 - Use AX Form As lookup in Dynamics Ax

In this article we will cover and learn how to create a lookup form and link this lookup form with EDT Field by following the step-by-step walk-through.

Scenario:-
As part of this tutorial, Consider that we need to overwrite the system lookup and use AX form as a lookup for the StringEditField.


StringEditField Lookup

public void lookup()
{
    Query Query ;
    QueryBuildDataSource QBDS;
       
    SysTableLookup systbl=SysTableLookup::newParameters(tableNum(CustTable),this);
    systbl.addLookupfield(fieldNum(CustTable,AccountNum));
    systbl.addLookupfield(fieldNum(CustTable,CustGroup));
    Query=new Query();
    QBDS=Query.addDataSource(tableNum(CustTable));
    
    systbl.parmQuery(Query);
    systbl.performFormLookup();
}


Reference Group Lookup

public Common lookupReference()
{
    Query Query ;
    QueryBuildDataSource QBDS;
    SysReferenceTableLookup sysRefTablelookup;

    sysRefTablelookup =SysReferenceTableLookup::newParameters(tableNum(PayrollEarningCode),this);
    sysRefTablelookup.addLookupfield(fieldNum(PayrollEarningCode,EarningCode));
    sysRefTablelookup.addLookupfield(fieldNum(PayrollEarningCode,QuantityUnit));
    Query=new Query();
    QBDS=Query.addDataSource(tableNum(PayrollEarningCode));
    sysRefTablelookup.parmQuery(Query);
    return sysRefTablelookup.performFormLookup();
}


Lookup from Lookup From

public void lookup()
{
    Args args;
    FormRun custlookup;
           
    args=new Args();
    args.name(formStr(CustlookupForm));
    args.caller(this);
    custlookup=classFactory.formRunClass(args);
    custlookup.init();
    this.performFormLookup(custlookup);        
}


How to Create a Lookup Form

1-Create a new Form Named "CustLookupForm"

2-Add "custTable"  in the form data source and in the reference data source of "custTable"add "DirPartyTable".
3-Set the property of custTable as below:-

Name : CustTable               Table : CustTable
Index  : AccountIdx             AllowCheck : No
AllowEdit : No                     AllowCreate : No
AllowDelete : No                 OnlyFetchActive : Yes

4-Set the property of DirPartyTable as below:-
Name : DirPartyTable         Table : DirPartyTable
JoinSource : CustTable      JoinRelation : DirPartyTable_FK

5-Set propertys on Design node as below:-
Frame : Border                         WindowType : Popup
Style : Lookup

6-create a new Grid and set its property as below:-
ShowRowLabels : No           DataSource : CustTable

7-Add new stringEdit control on the grid and set its property as below :-
Name : CustTable_AccountNum          AutoDeclaration : Yes
DataSource : CustTable                         DataField : AccountNum

8-Add new stringEdit control on the grid and set its property as below :-
Name : DirPartyTable_Name         
DataSource : DirPartyTable                   DataField : Name

9-Add new stringEdit control on the grid and set its property as below :-
Name : CustTable_CustGroup        
DataSource : CustTable                         DataField : CustGroup


10-Overwrite form init method

public void init()
{
    super();
    element.selectMode(CustTable_AccountNum);
}

11-Overwrite form run method
public void run()
{
    FormStringControl CustAccount;
    boolean Filterlookup;
    ;

    CustAccount=SysTableLookup::getCallerStringControl(element.args());
    Filterlookup=SysTableLookup::filterLookupPreRun(CustAccount,CustTable_AccountNum,CustTable_DS);
    super();
    SysTableLookup::filterLookupPostRun(Filterlookup,CustAccount.text(),CustTable_AccountNum,CustTable_DS);

}


Friday, May 13, 2016

AX-2012 - Record Level Security for Transfer order screen


AX-2012 - Record Level Security for Transfer order screen

In this article we will cover Record Level Security. We will learn how to implement record level security on Transfer Order Screen by following the step-by-step walk-through.

Scenario:-
As part of this tutorial, Consider that we need to set restriction on shipping and receiving Transfer order, as each warehouse has a responsible user and only this user should be able ship and receive goods on his owned warehouse.

We will set a restriction on transfer order screen so each user can view only TOs which is related to there warehouse, and set restriction on  shipment and receiving so user can only ship from there warehouse or receive on there warehouse.  

Solution:-
For each warehouse create a new role and for each role create two security policy, One to set restriction on Transfer order view and another one to control the ability of shipping and receiving on TO.

For ex the user is responsible for warehouse 31.

Steps:-
1-Create a new Role Named "Site31", user with these role will be able to view TOs From/To warehouse "Site31" and also ship TO from warehouse "Site31" and receive To on warehouse "Site31".

2-Create two Security policy and two query to handle the restriction on transfer order screen.

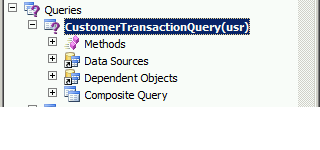
3-Create a Query named "Site31view" and add "invent Transfer Table" as data source, this query will be used to view only TOs that is belong to user warehouse.

4-Add Range on the data source to select TOs that are from/to user warehouse as below 


5-Create a new security policy named "Site31View" and assign query "Site31view" on it
As below :-
Primary table: invent transfer table                  Query: Site31view
Constrained table: yes                                      Enabled: yes
Operation: select                                               RoleName: Site31


6-Create second Query named "Site31CRUD" and add "invent Transfer Table" as data source, this query will be used to set restriction on  shipment and receiving so user can only ship from there warehouse [Site31] or receive To there warehouse [Site31].
These query will be validate by the system whenever a TO is updated or inserted.

7-Add Range on the data source as below :-
So user can update TO when TO is from warehouse "31" with status "Created" or To warehouse "31" with status shipped.

These ranges will allow user with role "site31" to ship TOs from there warehouses [site31], and receive TOs to there warehouses [site31]. 

Note:-When add the range on query the expression range may be too large to be inserted as the range has limit length,you can split the expression on two ranges but take care that these two ranges should be on the same field if you want to concatenate between them with "OR" clauses If they are different field the expression will be "AND" clauses.


8-Create a security policy for CRUD operation and set property as below:-

Primary table: invent transfer table                  Query: Site31_CRUD
Enabled: yes                                                      Operation: insert, update and delete
Role: Site31


9-Go to System Administration >> Users >> select any user >> Click on Assign roles and Assign Role "Site31" on the user.
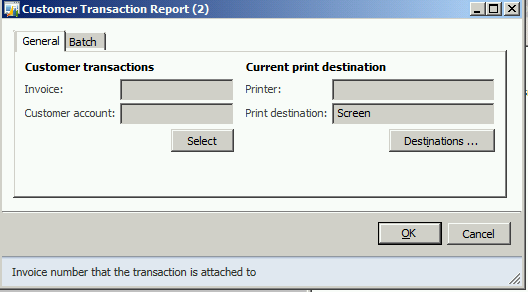
Now , let us log in with the user credentials for which we have assigned the new Role and verify that user can only view TOs From/To his owned warehouse and ship Transfer order screen from his warehouse and receive TOs to his warehouse.


AX-2012 - Developing SSRS reports using Report data Provider.


AX-2012 - Developing SSRS reports using Report data Provider.


In this article we will cover Report data provider (RDP) class and Report contract class. We will also learn how to implement these classes for our reporting needs. We will learn creating an report using the RDP class by following the step-by-step walkthrough.

Report Data Provider (RDP) Framework:-

 A report data provider (RDP) class is an X++ class that is used to access and process data for a report. An RDP class is an appropriate data source type when the following conditions are met:
  •     You cannot query directly for the data you want to render on a report.
  •     The data to be processed and displayed is from Microsoft Dynamics AX.

Report Data Provider Class is an X++ class that is used to access and process data for a SSRS report. The RDP class processes the business logic based on a specified parameter and/or query and returns a dataset to the reporting services. In order to create a RDP class in AX, you have to extend that class with SRSReportDataProviderBase. This tells AX that this class will be used by reporting services to process the data.

Two important attributes are used in RDP classes:
  • SRSReportQueryAttribute: specifies which AOT query will be used in this report. If the RDP class uses an AOT query to process data, define this attribute at the beginning of the class.
  • SRSReportParameterAttribute: defines the data contract class that will be used by this report to prompt for parameter values. If the RDP class contains any parameters this define this attribute at the beginning of the class.
Note: Both the attributes are optional. If the report does not use any query or does not want any parameter to filter report data, these attributes do not need to be used.

Data Contract Class:-
This class is used to define one or more parameters that will be used in a SSRS report.We can define any number of parameters using X++ statements of any data type, which can be passed on to the RDP class. And then, we can use the same contracts to query data from the database engine which will decrease an overhead on execution of a query in SQL.

A data contract class is an X++ class which contains parm methods with the DataMemberAttribute defined at the beginning of the method.


Table
An AX table is used as the dataset to store data for the report. The RDP class processes the data and stores it in the table which is then used by a SSRS report to render data.

A table can be a temporary table (InMemory or TempDB) or a regular table, but it is Microsoft best practice to use a temporary table.

The type of temporary table is based upon the performance considerations. InMemory temporary table is used when the data set is small, while TempDB is normally used for larger datasets to improve performance.


Now consider a scenario, where we have to display list of customers transactions. It is relatively simple report but have to build this report based on RDP or Report Data Provider framework.


Steps:-

  1. Create a temporary table
  2. Define the report parameters
  3. Add business logic for the report
  4. Create a reporting project
  5.  Bind a report to a report data provider class

Step 1 :- Open an Ax client. and press Ctrl + shift +P keys to open Development work space.
You can find projects at View=>Projects => Public project.
Create a new project at and rename it with "CustTransactionRDPDemo"


Step 2:- create a temp table and rename it with "CustTransactionTMP" and set  TableType to   tempDb.

The major step in RDP report is decision the fields require in report, create a temp table and add these field in temp table. For current example what fields we required on report are as follow:-
 
Now save the table, right click compile and synchronize table.


Step 3 :- Now create a AOT Query with Name "CustomerTransactionQuery". Add data source "CustTrans" and Save this query.
Step 4:- Define the report parameters For report we required three parameters: ["Customer Account", "From date" and "To date"].

In Report Data Provider framework we have to create a data contract class.
Create a new class in, rename it "CustomerTransactionContract".
In its declaration section create three variables

[DataContractAttribute]
class CustomerTransactionContract
{
  CustAccount CustomerAccount;
  TransDate FromDate;
  TransDate ToDate;
}

Create three data method that has setters,getters and the DataContractAttribute attribute.
-First parameter is "CustAccount"

[DataMemberAttribute(identifierStr(CustAccount)),
SysOperationLabelAttribute ("Customer Account"),
SysOperationHelpTextAttribute("Customer Account"),
SysOperationDisplayOrderAttribute("1")]
public CustAccount  parmCustomerAccount(CustAccount _CustomerAccount = CustomerAccount)
{
   CustomerAccount = _CustomerAccount;
   return CustomerAccount;
}

-Second parameter is "FromDate"

[DataMemberAttribute(identifierStr(FromDate)),
SysOperationLabelAttribute ("From Date"),
SysOperationHelpTextAttribute("FromDate"),
SysOperationDisplayOrderAttribute("2")]
public TransDate parmFromDate(TransDate _FromDate = FromDate)
{
   FromDate = _FromDate;
   return FromDate;
}

-Third parameter is "ToDate"

[DataMemberAttribute(identifierStr(ToDate)),
SysOperationLabelAttribute ("To Date"),
SysOperationHelpTextAttribute("To Date"),
SysOperationDisplayOrderAttribute("3")]
public TransDate parmToDate(TransDate _ToDate = ToDate)
{
   ToDate = _ToDate;
   return ToDate;
}

Step 5:- Add business logic for the report.

In Report data provider framework we have to write Data provider classes,which contain business logic to populate temp table.For this we have to create a new class"CustomerTransactionDP"
and extend from SRSReportDataProviderBase and add "SRSReportParameterAttribute" Attribute to define the contract class.

[SRSReportParameterAttribute(classstr(CustomerTransactionContract))
,SRSReportQueryAttribute(queryStr(CustomerTransactionQuery))]
class CustomerTransactionDP extends SRSReportDataProviderBase
{
   CustTransactionTMP _CustTransactionTMP;
}

Create two method,one will work as getter method to return the temp table,and second one which contain logic that populate temp table.    

[SRSReportDataSetAttribute("CustTransactionTMP")]
public CustTransactionTMP getCustTransactionTMP()
{
   select * from _CustTransactionTMP ;
   return _CustTransactionTMP ;
}

public void processReport()
{
   TransDate _FromDate;
   TransDate _Todate;
   AccountNum _CustAccount;
   CustomerTransactionContract dataContract;
   Query query;
   QueryRun queryRun;
   QueryBuildDataSource queryBuildDataSource;
   QueryBuildRange queryBuildRange;
   QueryBuildRange TransDateFilter;
   custtrans querycusttrans;
   query = this.parmQuery();
   dataContract = this.parmDataContract();
   _CustAccount = dataContract.parmCustomerAccount();
   _FromDate = dataContract.parmFromDate();
   _Todate= dataContract.parmToDate();

   queryBuildDataSource = query.dataSourceTable(tablenum(CustTrans));
   if (_CustAccount)
   {
      queryBuildRange = queryBuildDataSource.findRange(fieldnum(CustTrans, AccountNum));
      if (!queryBuildRange)
      {
        queryBuildRange = queryBuildDataSource.addRange(fieldnum(CustTrans, AccountNum));
      }
      queryBuildRange.value(_CustAccount);
   }
   TransDateFilter =  SysQuery::findOrCreateRange(query.datasourceTable(tableNum(custtrans)),fieldNum(custtrans,transdate));
   TransDateFilter.value(SysQuery::range(_FromDate,_Todate));

   queryRun = new QueryRun(query); 
   ttsbegin;
   while(queryRun.next())
   {
      _CustTransactionTMP .clear();
      querycusttrans = queryRun.get(tablenum(custtrans));
      _CustTransactionTMP.AccountNum =  querycusttrans.AccountNum;
      _CustTransactionTMP.AmountMST =  querycusttrans.AmountMST;
      _CustTransactionTMP.Invoice =  querycusttrans.Invoice;
      _CustTransactionTMP.TransDate =  querycusttrans.TransDate;
      _CustTransactionTMP.TransType =  querycusttrans.TransType;
      _CustTransactionTMP.Txt =  querycusttrans.Txt;
      _CustTransactionTMP.Voucher =  querycusttrans.Voucher;
      _CustTransactionTMP.CustName = CustTable::find(querycusttrans.AccountNum).name();    
      _CustTransactionTMP.insert();
   }
   ttscommit;   
}

Now compile the class, generate Incremental CIL.
Step 6:- Open Visual studio and create a new report project named "CustTransRDPReport".

Datasets: Datasets retrieve data from the AOT query. It acts as a bridge between AX and the SSRS report. Only the fields added in the datasets can be used in a report.
Designs: It defines the layout of the report.
Images: It contains the images that you want to display in the SSRS report.
Data Methods: It contains the business logic which can then be used in the report.
Parameters: It is used to apply filtering to the data in a report.


Add new Dataset named "CustTransaction",navigate to the property of the dataset and
set Data Source Type to “Report Data Provider”.


Click on Query and from browser window select The data provider class we created in previous step "CustomerTransactionDP"


Expand parameter of report and open the property of CustAccount parameter and set its allow blank to true and nullable to true, so if no customer is selected, report will run for all customer in legal entity.


  There are two types of designs that can be created in a SSRS report:
-Auto Design:
Visual studio automatically creates a design based on the dataset provided. Auto design is the preferred method because it is easy and usually fulfills the requirements for the majority of scenarios.

-Precision Design: It is used when you need custom placement of fields or the layout of the report is too complex.

In this demo we will use Precision Design:-


1- Navigate to Designs node and add new precision design named "Report".
2- Navigate to report node and press edit and you can design the layout as required.

3-then save and deploy the project from Solution explorer.

Step 7 :- To open the report in AX, a menu item is required. Create a menu item that will open the report from AX.

Now switch back to AOT. Create a new menu Item of type "Output"

And set menu item Name as "CustomerTransactionReportRDP" and set its properties as follow


Save it and right click on menu item and open it.

Report Dialog

Set values for From Date and To date and run the report, Report will work with business logic as follow


AX-2012 - Developing SSRS reports using an AOT query.

AX-2012 - Developing SSRS reports using an AOT query.

Scenario:-
As part of this tutorial, the report will print a list of customers and their transaction.

Steps:-
1-Open AX and press ctrl+d to open development workspace.
2-Open AOT and Add a new Query named "CustomerTransactionQuery".
3-Expand its data Source Node, Drag "CustTrans" table from tables to the data source.
4-Now expand the field Node and set its "dynamic" property to  "yes".
5-Now Save the Query and compile.
6-Open Visual studio and create a new report project named "CustTransactionReport".

Datasets: Datasets retrieve data from the AOT query. It acts as a bridge between AX and the SSRS report. Only the fields added in the datasets can be used in a report.
Designs: It defines the layout of the report.
Images: It contains the images that you want to display in the SSRS report.
Data Methods: It contains the business logic which can then be used in the report.
Parameters: It is used to apply filtering to the data in a report.

7-Add new Dataset named "CustTransaction",navigate to the property of the dataset and
press on Query.
8-Select the query from open diolog.
9-Select the fields you want to display in the report and press OK.

There are two types of designs that can be created in a SSRS report:
-Auto Design:
Visual studio automatically creates a design based on the dataset provided. Auto design is the preferred method because it is easy and usually fulfills the requirements for the majority of scenarios.

-Precision Design: It is used when you need custom placement of fields or the layout of the report is too complex.

In this demo we will use Precision Design:-


1- Navigate to Designs node and add new precision design named "Report".
2- Navigate to report node and press edit and you can design the layout as required.
3-then save and deploy the project from Solution explorer.

4-To open the report in AX, a menu item is required. Create a menu item that will open the report from AX.


 5-Set the object type property to "SSRSReport" ,Object :CustTranasctionReport

6-Navigate to menu item and press ctrl+O to open the report


 7-Click on ok to run the preview